Tuesday, July 30, 2013

Peanut Butter Cookies


While planning and packing for our mini-Colorado vacation, StudHubs and Little Bird requested some cookies to go along on our trip.
What kind of cookies did they ask for?
Peanut Butter.
Everytime. Never fails.
Actually, StudHubs like the peanut butter cookies with the Hershey's kisses in the middle (which kind of look like little flowers), so I might be generous and throw some of those in there for him.
Only because I love him.

I feel like all that I'm doing is constantly posting recipes for sweets, but I'll even this out soon.
Believe me. You'll be begging for my dessert recipes again.
Mwuahaha.


Assemble ingredients! I like saying that. Even though I haven't watched the Avengers yet.
Sad story, but we'll probably watch it soon. I have it on Netflix!
(*Not pictured is the brown sugar and Hershey's Kisses)


Cream your shortening and peanut butter into a beautiful creamy concoction.


Looks the exact same, doesn't it? But don't worry, this is a different picture!
Add in the egg, milk, and vanilla.
Mix that bad boy up.


In a separate bowl (sorry for the lack of picture, I was on a time-crunch with making these), sift together your flour, salt, baking soda, and cinnamon.
Slowly add into the peanut buttery goodness.


Until it's all incorporated! It comes together beautifully and it fun to mold.
If you have kids, this will be one of their favorite cookie dough recipes. Little Bird loves to help me make the balls of dough and them mash them with a fork.
She can get a little excessive with the fork though...

Let the dough chill in your fridge for at least an hour.
I had mine chill overnight because the heat in Texas in unbearable.
Hot ovens make for hot kitchens - which does not make for happy families in the summer.


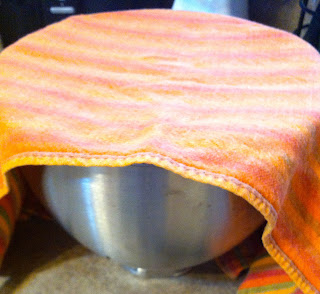
There are multiple options to cover your cookie dough. Either with a tea towel - like I do, or with plastic wrap, or even with both!
Please note that if you chilled your cookie dough overnight, set it out for at least ten minutes before you handle the dough. This allows it to get soft enough to handle!


Roll your cookie dough in sugar!


Put on your baking pan (in case you weren't sure what to do with these delectable balls of dough).


Then make a crisscross pattern with your fork!
For the cookies with the chocolate kisses in the middle, I didn't flatten though because then it makes the cookie awkwardly thin. So for each pan, I made six cookies with the crisscrosses and six cookies were left in their primitive state.


Be sure to unwrap your chocolate kisses while the cookies are baking to a beautiful golden brown.


Bake up those cookies!

Once the come out of the oven, transfer them to a cooling rack immediately. They will seem soft and gooey, but I promise they harden up as they cool.
Immediate push the chocolate kisses into the center of your cookie dough until it just barely sits in there.

Like this.

Then sit back and watch your family devour these bad boys.
If you're like me, you'll have to hide a few just so you can have some. These are usually gone in an hour in my household.

Ingredients for Peanut Butter Cookies

Adapted from Hershey's Kitchens
  • 1/2 cup shortening
  • 3/4 cup creamy Peanut Butter
  • 1/3 cup sugar
  • 1/3 cup packed brown sugar
  • 1 egg
  • 2 tbsp milk
  • 1 tsp vanilla extract
  • 1 1/2 cup all-purpose flour
  • 1 tsp baking soda
  • 1/2 tsp salt
  • 1 tsp ground cinnamon
  • Additional sugar for rolling dough
  • Hershey's kisses (optional)

Directions

Cream shortening and peanut butter in a large bowl. Add in 1/3 cup of sugar and brown sugar, beating until fluffy. Add in milk, egg, and vanilla, mixing well. In a separate bowl, sift together flour, soda, salt, and cinnamon. Slowly add into peanut butter mixture, making sure to beat the dough together until everything is incorporated. 
Refrigerate for at least one hour. Make sure to let the dough stand at room temperature for at least ten minutes if refrigerated overnight.
Preheat oven to 375 F.
Shape dough into 1-inch balls and roll in additional sugar until coated.
For regular peanut butter cookies, use a fork to make a crisscross pattern on the cookie.
For cookies with chocolate kisses, leave cookie dough in a ball form on your baking pan.
Bake for 8 to 10 minutes.
If you are making the cookies with the chocolate kisses, make sure to unwrap your kisses while they are cooking.
Remove immediately to a cooling rack.
Press chocolate kisses into the unformed cookie dough and let sit until cookies come to room temperature.
Hide some and let your family enjoy the rest.

Photos were taken with iPhone 4 and edited with iPhoto.


Monday, July 22, 2013

Strawberry Cupcakes with Cream Cheese Frosting

This weekend was my Great-Grandfather's 95th birthday.

Ninety-five.


He's a WWII veteran and the patriarch of my family, yet he's still as goofy as if he was twenty.

And his most favorite thing in the world is strawberries.
Anything strawberry-flavored and he's sold.


So when my family asked me to make him some birthday cupcakes, I couldn't resist the temptation to make them strawberry.


Needless to say, everyone loved them.

This is originally a Martha Stewart cupcake recipe, but after baking three different sets of cupcakes, I decided that I liked them baked at 375 F instead of the 350 F that she likes to bake them at.

This is a nicely light and fluffy cupcake and the strawberries bake up and flavor this beautifully. I am also a sucker for the strawberry-cream cheese pairing, so I decided on that over her decadent Strawberry Meringue Buttercream.


Assemble your ingredients! (Bread is not an ingredient, I promise)


Firstly, sift together your two types of flour, salt, and baking powder in a separate bowl.


Cream your butter and sugar until it's nice and fluffy. I changed a diaper while this was creaming, so it's extra fluffy!


Add in your eggs one at a time and the vanilla and mix that baby good.
The batter is a bit pale (though my pictures make it look pretty vibrant. I also use farm-fresh eggs from my father-in-law's chickens, so mine tends to be a bit more yellow).


Slowly add in 1/4 of your flour mixture.


Then about 1/3 of the milk.


Keep alternating. Always begin and end with flour.


While your batter is mixing, I took the time to dice a whole package 16oz package of strawberries.
The recipe calls for 10oz, but I'm not really counting.
Plus - the more strawberries, the better.


Pour your batter into baking cups in a cupcake pan until each cup is about 2/3 of the way filled.

Here's where I tried three different baking methods.

Martha says to bake at 350 F.

Well, I tried that.
And my cupcakes came out like craters.

So I tried 375 F for ten minutes and then 350 F for the last ten minutes.
Not so bad, but still craters.

With the third batch, I tried 375 F the entire way through.
Behold! Flat cupcakes!
Which are perfect for me because of the way that I like to frost them.

Don't get me wrong, I'm a huuuuuge fan of fluffy cupcakes - but with the strawberries in the recipe, it makes for a certain amount of density which doesn't allow much room for fluffiness.

Food science, ya'll.


Then after slaving away in the kitchen all morning, I drove to College Station with Little Bird to attend a wedding.


Many congratulations to the happy couple!

Then I drove back all night and after getting home at one in the morning, Little bird wakes me up at 7am and it's time to make frosting!


Assemble ingredients! Make sure that your cream cheese and butter are to room temperature!
(If not, nuke them in the microwave until soft to the touch, but not overly soft - more on that later.)


Beat the cream cheese and butter until it's blended.
Then add in your vanilla, pinch of salt, milk, and powdered sugar.


Beat 'em up.
Beat 'em up until they yield to the pressure of your mixer and conform into one stiff, but soft mess of sugary confection.


Then put that incredible frosting into your piping bag (or a plastic bag with a corner snipped out) and pipe onto your cupcakes.
Another method is to spread a thin layer of frosting on the top of the cupcake and then pipe more frosting on that. It makes for a well-covered cupcake, but it's not as pretty.

Also, I meant to go out and buy some tips for my piping bag and I forgot.
So, my cupcakes certainly aren't up to par.

But who cares?
CUPCAKES!


Ingredients

Strawberry Cupcakes

  • 1 1/2 cups all-purpose flour
  • 1 1/2 cups cake flour
  • 1 tbsp baking powder
  • 1 tsp salt
  • 1 cup (2 sticks) unsalted butter, room temperature
  • 1 3/4 cup sugar
  • 4 eggs
  • 2 tsp vanilla extract
  • 1 1/4 cup milk
  • 1 package of strawberries, hulled and diced into small pieces
Sift together flours, baking powder, and salt in a medium bowl.
Cream sugar and butter until light and fluffy - 3-4 minutes. Slowly add eggs one at a time. Add vanilla and mix well.
Carefully add in flour mixture to butter mixture, alternating with milk. Begin and end with flour mixture. Mix until ingredients are well-blended.
Slowly fold in diced strawberries.
Be sure to scrape the sides of your bowl down and make sure the strawberries are incorporated throughout the batter.

Pour into baking liners in a cupcake pan.

Bake at 375 F for 20 minutes.

Makes about 30 cupcakes

Cream Cheese Frosting

*note that measurements may not be exact. I usually guess at how much I'm putting into my frostings*

  • 1/2 cup (1 stick) butter, room temperature
  • 8 oz cream cheese, room temperature
  • 1 tsp vanilla
  • 1/8 tsp salt
  • 4 cups powdered sugar
  • 4 tbsp milk (more or less, use until frosting reaches desired consistency)
Cream butter and cream cheese in a medium bowl until creamy. Beat in vanilla and salt.
Add in powdered sugar by a cupful and milk by a tablespoonful until you have reached the desired consistency of your frosting.
Spoon into a piping bag or a plastic bag with the corner snipped out and pipe onto cupcakes.

Extra frosting can be frozen.


Now it's time to plan a mini-vacation to Aurora, Colorado with the StudHubs and Little Bird...

Hope you enjoyed this! Comment and tell me how yours turned out!
All photos were taken with iPhone 4 and edited with iPhoto.


Thursday, July 18, 2013

Banana Bread with Streusel Swirl

The warm smell of baked bread wafting through the house in the early morning. It's a homey smell, laced with warm cinnamon.
It's a smell I woke up to a lot in my childhood home.
The smell of freshly baked banana bread.


Oh, the memories.

My mother has a slight obsession with baking this Southern comfort food during the summertime and especially in the holidays. But who doesn't love Banana Bread?!

The recipe I used for this is a tried-and-true family recipe that goes all the way back to my Great-Grandmother in the 1950s.
It's a bit different than my own, but I couldn't think of a better recipe to share with you than this version.

It's a very sturdy version, that bakes up beautifully into a tall one pound loaf. I've tweaked this a tiny bit and added a streusel filling and topping along with some chocolate chips. I have a lovely coffee cake recipe that's my go-to (I'll add this later) and rather than make two different things, I thought I would combine them.

I hope you enjoy this as much as my family does!

Firstly, gather your ingredients!


Cream the shortening and sugar.


Beat your two eggs in a small glass before adding them to your batter. I like to use my Norman Rockwell collector's glasses. Also add the mashed bananas, vanilla, and lemon juice at this point. Mix it well!

Finally, add in the rest of your ingredients and mix until it's all incorporated and looks delicious!


Be sure to preheat your oven to 375 F and put half of the batter in a well-greased loaf pan.
Now it's time for streusel!


Combine all of your streusel ingredients in a bowl (I used a glass bowl, I promise it's not just sitting on my counter!) and crumble with your hands until the butter is well incorporated in everything. It should be crumbly, not wet. Put a very generous layer of streusel (about half of what's in the bowl) on the batter that's in your pan and sprinkle generously with chocolate chips. I like the mini kind.


Pour the remaining batter on top. Use a knife to swirl the batter and the streusel filling around in your loaf pan. Top with remaining streusel and some more chocolate chips (if you feel like it). Put it in the oven and bake until set and a knife comes out easily without a lot of batter on it. 
Note: The knife test might come out with butter on it from the streusel filling. This is fine.

My Little Bird enjoying some of the finished product for breakfast this morning. 
Big slice for a little girl.


Mers' Banana Bread

  • 1/2 c. shortening
  • 1 c. sugar
  • 2 eggs
  • 1 c. mashed bananas (about 3)
  • 1 tsp. lemon juice
  • 1 tsp. vanilla
  • 2 c. flour
  • 3 tsp. baking powder
  • 1/2 tsp. salt
  • 1 tsp. cinnamon

Streusel Filling

  • 2/3 c. sugar
  • 1/2 c. flour
  • 1 tsp. cinnamon
  • 4 tbsp. cold butter

Directions

Preheat oven to 375 F.
Cream shortening and sugar in a stand mixer. Beat eggs in a separate glass or bowl and add to the creamed mixture. Add in mashed bananas (or whole overly-ripened bananas - which will smash themselves), lemon juice, and vanilla. Sift flour, baking powder, cinnamon, and salt in a separate bowl and add to the wet mixture in batches to make sure it's well-incorporated.

In a separate bowl, combine sugar, flour, cinnamon, and butter for the streusel until crumbly.

Pour half of the banana bread batter into a well-greased loaf pan. Sprinkle streusel filling on the batter and adorn with chocolate chips. Add in remaining batter and swirl with a knife to get a swirl effect. Top with remaining streusel and chocolate chips.

Bake in the oven for an hour or until bread is set and knife comes out clean.*

Makes 1 one pound loaf.

* Baking times vary depending on the weather or the type of oven you have.

Photos were taken with my iPhone 4 and edited on iPhoto.


Monday, July 15, 2013

Introducing...

My name is Danielle.
And i'm a self-proclaimed foodie.

...I'm also a stay-at-home mom; a do-it-yourselfer; a wife; the list goes on and on really.

One thing has never changed though.
My love for food and anything that keeps me occupied (or leaves me with a sense of accomplishment).

And upon some suggestions from friends and family, I've set about to create this monstrosity where culinary prowess and craftiness collides.

So thanks for checking this out! I'll try to start posting recipes and craft ideas and different things that range from this to that.

I do have a plan (if you were wondering) for this blog, it just may take me awhile to get around to it.

Be sure to check back and look forward to some upcoming posts and specials guests (special food diets anyone?)